Search the Community
Showing results for tags 'Custom'.
Found 83 results
-
Hi guys, Does anybody have a soundshader.hpp customized for the lynx or any .50cal sniper rifle? For the other weapons we used the MX Shader, but figured out that a sniper would be different. Cheers
-
Hello, I'm currently trying to get Ryan's zombies to spawn with custom clothes after they are manually spawned. There's a select random class in varibles.sqf which works fine (not my code) slowZombies = [ "RyanZombieC_man_1slowOpfor", "RyanZombieC_man_hunter_1_FslowOpfor", "RyanZombieC_man_pilot_FslowOpfor", "RyanZombieC_journalist_FslowOpfor", "RyanZombieC_OrestesslowOpfor", "RyanZombieC_NikosslowOpfor", "RyanZombieC_man_polo_1_FslowOpfor", "RyanZombieC_man_polo_2_FslowOpfor", "RyanZombieC_man_polo_4_FslowOpfor", "RyanZombieC_man_polo_5_FslowOpfor", "RyanZombieC_man_polo_6_FslowOpfor", "RyanZombieC_man_p_fugitive_FslowOpfor", "RyanZombieC_man_w_worker_FslowOpfor", "RyanZombieC_scientist_FslowOpfor", "RyanZombieB_Soldier_05_fslowOpfor", "RyanZombieB_RangeMaster_FslowOpfor", "RyanZombieB_Soldier_02_fslowOpfor", "RyanZombieB_Soldier_lite_FslowOpfor", "RyanZombieB_Soldier_lite_F_1slowOpfor", "RyanZombieB_Soldier_02_f_1slowOpfor" ]; Now it selects one of those zombies into the spawner and then spawns it in but I want to add custom clothes (ww2 clothes) to them. Here's a the zombieSpawner.sqf (again mostly not my code) private ["_zombie","_spawnPoint","_marker"]; _uniform = ["U_LIB_GER_Soldier_camo4"]; _headgear = ["H_LIB_GER_HelmetCamo2"]; _vest = ["V_LIB_GER_VestSTG"]; while {true} do { waitUntil {zombiesAlive < 1}; roundNum = roundNum + 1; zombiesAlive = 0; missionNamespace setVariable ["roundNum", roundNum]; publicVariable "roundNum"; _marker = createMarker ["respawn_west", getMarkerPos "respawn_spawn"]; _marker setMarkerColor "ColorWEST"; _marker setMarkerType "mil_circle"; waitUntil {missionNamespace getVariable ["GameBegin",0] == 1};//wait for first player to be ready if (roundNum % 5 == 0 && count allPlayers > 2) then { missionNamespace setVariable ["Demonround", roundNum]; publicVariable "Demonround"; uiSleep 10; zombiesAlive = 1; //for "_i" from 1 to (roundNum / 5) do //{ _spawnPoint = zombieSpawns call BIS_fnc_selectRandom; "RyanZombieboss1" createUnit [getMarkerPos _spawnPoint, zombieGroup, "this switchmove 'AmovPercMstpSnonWnonDnon_SaluteOut'; this setpos [(getpos this select 0) + random 15 - random 15, (getpos this select 1) + random 15 - random 15]; this addEventHandler ['killed', {[_this] spawn killed_zombie }]; this addEventHandler ['HandleDamage', {if (alive (_this select 0) and (_this select 1) isEqualTo 'neck') then {(_this select 3) setVariable ['money', ((_this select 3) getVariable 'money') + moneyOnDamage, true];};}];"]; //}; } else { missionNamespace setVariable ["RoundEnd", roundNum]; publicVariable "RoundEnd"; uiSleep 10; }; deleteMarker _marker; //spawn slow zombies for "_i" from 1 to ((rounds select roundNum) select 0) do { waitUntil {zombiesAlive < enemyMax}; _spawnPoint = zombieSpawns call BIS_fnc_selectRandom; _zombie = slowZombies call BIS_fnc_selectRandom; //_zombieObj = missionNamespace getVariable [_zombie, objNull]; _randomhat = _headgear call BIS_fnc_selectRandom; _randomuniform = _uniform call BIS_fnc_selectRandom; _randomvest = _vest call BIS_fnc_selectRandom; zombiesAlive = zombiesAlive + 1; _zombie createUnit [getMarkerPos _spawnPoint, zombieGroup, "this switchmove 'AmovPercMstpSnonWnonDnon_SaluteOut'; this setpos [(getpos this select 0) + random 15 - random 15, (getpos this select 1) + random 15 - random 15]; removeHeadgear this; removeVest this; removeUniform this; this addHeadgear _randomhat; this addUniform _randomuniform; this addvest _randomvest; this addEventHandler ['killed', {[_this] spawn killed_zombie }]; this addEventHandler ['HandleDamage', {if (alive (_this select 0) and (_this select 1) isEqualTo 'neck') then {(_this select 3) setVariable ['money', ((_this select 3) getVariable 'money') + moneyOnDamage, true];};}];"]; }; Now what it should be doing is removing the clothes from the zombies ONCE they spawn but it only refits them with the Headgear and backpack. So is there a way to remove clothes for ryan zombies? Everything else looks and works perfectly except this. Credit for code: Nazi Zombies on steam EDIT: So I tried forceadduniform and removed removeUniform and it sorta works. The Zombies have the clothes but now they don't move.
-

Task Force 1776 New Arma 3 Tanoa Domination Server
TaskForce1776 posted a topic in ARMA 3 - SQUADS AND FANPAGES
Hello, Task Force 1776 is proud to offer a new Tanoa Domination mission for Arma 3. We have all the new equipment & goodies plus all the great features of domination for the new Tanoa Map in Arma3. If you are not familiar with TF1776 we have been running Domination in Arma 2 since 2011 and still have pretty much the only active domination server left in Arma 2. We offer a unique twist to domination that most players have come to identify as the top version of the mission. Please visit us on the server and let your friends know about it. We also have a teamspeak, so feel free to hop on with a few of your friends and use a room to communicate. Thank you, Task Force 1776 Representative Ministry of Bureaucratic Administration and Activity Oversight Compliance Division www.TF1776.com Teamspeak: TS3.TF1776.com -
I've made a model for a static turret so far, I've read up on Zach's Full On Guide to Custom Weapons. Is this the same for static turrets? I'd imagine statics would be classified more as vehicles though. Is there a tutorial somewhere on turrets? Theres quite a few on weapons, doesn't seem to be any for turrets. Thanks
-

how to create a custom warfare mission please
Ke Bab Alp posted a topic in ARMA 2 & OA : MISSIONS - Editing & Scripting
hello there I have been playing arma for quite a long time in multiplayer, but now I would like to be able to create my own missions and put in my own stuff. For example I would like to know how to create a map warfare with predefined starting location for the bases. I would also like to put myself the money of the beginning And some cities already under control of a camp And I would see myself for the rest, if anyone knows how to do or, has a link to a good tutorial that explains how to do it,it will be really cool Cya -

Custom Action that triggers custom say3D sound
finicu posted a topic in ARMA 3 - MISSION EDITING & SCRIPTING
Hi. I want to add a custom action to a player that, when triggered, will play a custom sound "sound1.ogg" inside my mission file\music\ folder. My description.ext works properly, here it is: class CfgSounds { sounds[] = {01,02}; class 01 { name = "01"; sound[] = {"music\sound1.ogg", db+10, 1.0}; titles[] = {0,""}; }; class 02 { name = "02"; sound[] = {"music\sound2.ogg", db+10, 1.0}; titles[] = {0,""}; }; }; Note that sound2.ogg is not used yet. In the init field of the player that can play the sound, I have tried to make the custom action: this addAction ["Play Sound", this say3D "01"] but here's the problem: when I run the scenario, the sound is played at the beginning, right after the players spawn in, and there is no custom action on the player. If I forgot to add anything, please ask, this is my first post so I might have missed something... -

Custom Character Model Issues, Advice? [SOLVED]
Evilcallum1991 posted a topic in ARMA 3 - MODELLING - (O2)
This is my first post, so I'll begin by apologising for any rules I may break or any syntax issues. Secondly, Im Trying to remodel an entire Arma 3 unit for a mod I am creating. The model was imported to Object builder no worries, I then took my time to follow every tutorial I could get my hands on regarding rigging and setting the unit up to be a playable unit in game. Here is a list of everything that has been done up till now (Without knowing any extra steps): -LODs and Texture set up and working, tested in engine and in game. -Geometry working. -Memory components set up (Now these memory points were used for the Arma 2 example). -Weighting selection to allow for animations (So tedious). - model.cfg and config set up correctly (hopefully). Now when I load it into game, everything works fine, the class path, the textures, I can even control as player, and he moves around as normal. EXCEPT, the model remains in the default "T" stance and about half way through the floor. Does anyone know anywhere I could look, or give me any information on how I can make this work. (Please let me know if you need any more details, like images or my config and model.cfg) -
I'm trying to make a scenario for my unit. We are a PMC and we use expendable vehicles. I'm trying to give us some light armor that we can use but I'd like to make all of our vehicles black like they normally are and, I can't seem to find a way to make the BTR-80 black without using a mod that has ISIS symbols written all over it. I was wondering if anyone here knew how I can personally edit the vehicle in any way to maybe either remove these ISIS symbols or color my own. If possible I'd like to keep this within Bohemia's parameters and not have to use a personal mod, but if need be I can. Thank you in advance! ~Balthasaar
-
While I've kept the IRL island name, this terrain has been largely altered from the real island for various reasons. Besides the buildings and vegetation, I've chopped the top of the mountain off, altered a lot of roads, etc. However, it does still resemble the real place in some ways. Iwagi is a small island located in the Ehime prefecture, kinda in between Okoyama and Hiroshima. I'm planning on using assets from the Apex expansion, and so it will require having the expansion to play. Right now, it's a total of 6x6km(I guess that could possibly change if it's too small). The island itself is roughly 4x5km. I'm using a cell space(hoizontal scale) of 3m, which is slightly less than what is suggested by all the Arma terrain gurus, but I'm hoping with it being a pretty small terrain it will work out alright. While I tried to keep a lot of places true to it's IRL form, I'm mostly limited to Google streets and as such I'm completely winging most of the island. Besides that, it needs to be military friendly.. so I completely chopped the top of the mountain and I'm going to put a military base there. =] I think I started working on Iwagi in February of this year. Originally, I had started with a completely custom terrain taking bits and pieces from all over the world in Google Earth Pro and piecing them together like a Frenkenstein. After a year of killing myself I decided to jump into a smaller terrain and use a real world place. This will be my first terrain for anything. Being as small as it is, I'm not sure it will be suitable for anything milsim related(hopefully I'm wrong), I'm hoping to be able to use it for Battle Royale and/or maybe some survival mods. GOALS: - I want to keep the mod filesize as small as possible. Thus, a smaller terrain with very limited user made content/models. - I don't want to require the user to have any other community made mods loaded to play on the terrain. TO DO LIST (as of 14 Sep 2016) Finish surface mask. Finish sat map. Finish watershed erosion and reservoir objects. Place random rocks. Finish rock outcrops. Fix mixture of vegetation in forests, add rocks and fallen trees. Finish military housing area. Finish military base layout and objects. Finish airport runway, objects, and buildings. Remove all vegetation from roadways and under buildings and other objects where it's noticeable. Set water level. Check AI movements along roadways and bridges. Have all bridges placed and remove road textures from underneath. Place road intersections and transitions. Finalize clutter mixture for all surfaces, no texture issues, set color and wind variation. Fix all road gradients, remove protrusions, smooth. Place polygons for vegetation. Place back roads and trails polylines. Place secondary roads polylines. Place main highway polylines. Put together a rough sat mask for ground textures. Make a place for a large military base and housing. Sculpt a rough height map with L3DT. Put together a rough sat map to use as a guide. MEDIA IRL Location: https://goo.gl/maps/YMEwqNyjmD32 Wikipedia: https://en.wikipedia.org/wiki/Iwagi,_Ehime Photo album: http://imgur.com/a/hqQSr I don't really have many pictures or videos yet, but I'm usually streaming on Twitch when I'm working on it. Once I can get it working in Arma I'll take some snapshots and make a video. https://www.twitch.tv/cring0 https://www.youtube.com/user/cringocringo I'll be back once I have more. If you have any questions or suggestions please let me know.
- 71 replies
-
- 13
-

-
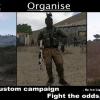
Revenge A year has passed since the CSAT faction was able to get their retribution against their NATO enemies, now that they have the Mediterranean under their control, there has been a increasing amount of insurgency across Altis. The CSAT have decided to hire a mercenary outfit from ION to help them eliminate the Insurgency threat. Follow the story of Lt. Sanders, who is as an ION contractor is hired to stop the insurgency in the Mediterranean. Please Note: This custom campaign of mine starts a year after my previous campaign: Retribution. In order for you to understand the story you would want to have played that campaign. Retribution - Armaholic,Steam Workshop Download: Download - Steam Workshop Change-log: Version 1.3: Fixed an issue with the campaign config files where there were duplicate entrees so that it wouldn't load and arma 3 would crash because of it. Requirements: The CSAT Modification Project Theseus Services RHS: Armed Forces Of The Russian Federation RHS: United States Armed Forces
-

Custom Arma 3 game loading graphics. [SOLVED]
jakeplissken posted a topic in ARMA 3 - MISSION EDITING & SCRIPTING
Hello. I am wondering how to create a custom Arma 3 loading splash screen. I mean the one that shows when the game is first loading. The graphics are in ui_f_data.pbo, but I cannot find the config entry for this. I extracted the files for Alive mod that has a custom screen, but the code was obfuscated. I just want to use a custom screen for my mod to make it stand out, but I came up empty searching of Google, as I could only find results for making custom mission splash screens. Any help would be appreciated. Thanks. -
Hi there, I have this: http://www.armaholic.com/page.php?id=26339 which supports Zeus as a gamemaster. I was wondering how I can use unofficial mods in Zeus in multiplayer. Thanks a lot, Flames.
-
 First of all, hello to everybody who is reading through this. My team and me consisting of two other ppl who are both highly experienced scripters both 3 years+ experience. Who would tackle the difficult part of the project like for example scripting a who new custom survival mod (work is allready beeing done on that front see below) The whole project aims to combine all the good from the arma2 dayz mod (the feel and ambiance, the amazingly high chance to run into another person, the absence of, i can just do some lootruns sell junk at the trader and buy myself an as50), Arma3 features (everything the arma3 engine has to offer and that we can use to our advantage), and some highly polished and custom "exile like" features. (completely custom trading system and tradingzones thats about it, yes there will be no missions because missions are just a big mess all there is either the server is empty -> you can do your missions in peace or server is full -> everbody camps a missions and waits until some idiots starts to do the missions and then snipes him when hes at the crate. Aswell as no exile like base building see below at "Whats planned" Whats planned: As mentioned allready completely custom survival DayZ script (so no exile scripts -> fully custom and expandable). Highly customized map (but done properly well not just some barracks in a massive sand bank square haha we all know and hate that stuff) (Base map will most likely be the A2 Version of chernarus not CUP since it looks quite alot better) (allready in the works) Coming with that new map design what will happen exactly. The whole maplayout will be story based fyi. when a zombie outbreak starts, it will probably not just the country that outbreak was in fighting the outbreak there will be help from other countries. So what is planned multiple smaller outposts from different factions Obviously the whole map would be polished up with props and small overrun checkpoints to make it feel proper zombie appocalypse (further details on interest) When you have that properly planned map layout you almost have to make a fully custom loot table which means that you can only find american weapons at american outposts same with AK's bla bla i think you get the point. What this does very well is encurage ppl to go to multiple outposts to get the best loadout which increases traffic on the map tremendously. (the loottable is allready beeing worked on aswell) Adding to that will come a completely custom trading system that completely gets rid of the whole coin system and makes it far more realistic alswell as a new tradezone system in itself (further details only on interest) Custom crafting system will also be available aswell as a wear system on guns and vehicles. Completely custom base building no ugly ass block fortresses but realistic stuff like pichting a tent, diggin a small hole to hide a chest or seeking shelter in a house and barricading the windows and puting a lock on the door. Lots more in planned and if i would go into detail about most of this stuff here i would be writing this for the next few hrs, and nobody would care to read through this (i think its already a bit much) What are we looking for? Modeling artist, what tasks would be there ? Custom items: backpacks, misc items, clothing (also converting arma 2 clothing (like about 5 skins) and making it modular for the arma3 system) Custom props and eventually even smaller buildings. Config coder, what tasks would there be ? Managing all weapons giving them sound proper recoil etc. General config work for interactions and managing the addon files. Thank you very much for reading through this If you seem interested (and even if you dont have the exact skills we need feel free to still contact us) feel free to contact me or my mates and we will be discussed further details as mentioned already what is described above is mearly a part of the bear shell. Best regards Chris KiwiBear: http://steamcommunity.com/profiles/76561198018276573/ MrCopyright: http://steamcommunity.com/profiles/76561198067442279/ My steam: http://steamcommunity.com/profiles/76561198046410470/
 -

How to execute multiple .sqf's through custom GUI
SnakeDocc posted a topic in ARMA 3 - QUESTIONS & ANSWERS
So I'm trying to create a custom GUI I can open through an addAction on an object, and through that GUI be able to select different .sqf's via tick boxes and then execute multiple of them through a separate button, as well as having another button for executing an .sqf and one for closing the GUI (example GUI linked below), I've created the GUI and understand how to make it show up in game, but I can't work out how you then tie all the separate .sqf's to the separate buttons. Could anyone with experience explain what the next steps are or link me to a forum post I've missed, below I've linked my GUI EDITOR OUTPUT as Classes and exported Styles sheet below. GUI Editor Output https://pastebin.com/C2fHnjyu Styles Sheet https://pastebin.com/qFQrb3QX -
.thumb.png.a9ccff16425b76aed44ad5fd0058b23a.png)
Custom faction vehicle classes being overwritten?
hnchmc posted a topic in ARMA 3 - ADDONS - CONFIGS & SCRIPTING
Hey all, sorry if this is has already been answered, I've searched the internet and can't find an exact remedy. If there is already a post answering this, please just point me to it. Sorry then. Anyways, so my problem is with the custom vehicle classes being overwritten. What I mean by this is that after I make a custom faction, and custom vehicle Classes, the faction appears in game yet the vehicle Class names do not. Instead, they are replaced by the vanilla "planes", "cars", "men", etc for the type of unit respectively. For example: class CfgFactionClasses { class test_fac { displayName = "My Test Fac"; author = "hnchmc"; flag = "\a3\Data_f\Flags\flag_quontrol_co.paa"; icon = "\a3\Data_f\Flags\flag_quontrol_co.paa"; side = 2; }; }; class CfgVehicleClasses { class test_fac_vehicleclass_testplanes { displayName = "Test planes"; }; class test_fac_vehicleclass_testcars { displayName = "Test cars"; }; }; Then, when applied to vehicles using side = 2; faction = test_fac; vehicleClass = "test_fac_vehicleclass_testplanes"; in game it reverts back to the vanilla vehicle classes, where they're found under "planes" or "cars" Maybe I'm missing something? Anything helps -
*
-

Arma Reality Exile Chernarus |Deploy Bike|+loot|Virtual.G|25k|missions|Custom
g50st posted a topic in ARMA 3 - MULTIPLAYER
Hey would love to see new players join this up and coming community Server status: Online Map: Chernarus Website: http://armareality.org/ Server ip: 193.70.6.227:2302 name: Arma Reality Exile Chernarus |Deploy Bike|+loot|Virtual.G|25k|missions|Custom Staff: 4 Admins (need more) Come and play :) -
I am certain this been asked before but - how do I find out what addons I used in a custom mission Arma 3? Thanks
-
I have a static radio which I would like to play music I added. I searched around, but I can't find anything that works in Arma 3. What is the best way? -I have 13 .ogg files (music) -I would prefer an option to turn the radio on or off. -Music should sound only from the static object.
-
I used a model from another game but i made the geometry myself. So my problem is my car bounces when it drives then just spins out as seen here: I don't know whats happening, here's what I've checked so far: -axis is centered on wheel geometry -boundary is in right place -nothing from geometry is clipping on the ground -wheelcircumference is correct -all named selections are correct here's the geometry: I used the real weight (about 660kg) as the mass so could this effect anything also? and my model.cfg (is literally the unedited test car one): class Rotation { type = "rotation"; memory = 1; minValue = 0; maxValue = 1; angle0 = 0; angle1 = 1; }; class CfgSkeletons { class Default { isDiscrete = 1; skeletonInherit = ""; skeletonBones[] = {}; }; class Vehicle : Default {}; class Car : Vehicle { skeletonBones[]= { "drivewheel","", "wheel_1_1_damper_land","", "wheel_1_2_damper_land","", "wheel_1_3_damper_land","", "wheel_1_4_damper_land","", "wheel_2_1_damper_land","", "wheel_2_2_damper_land","", "wheel_2_3_damper_land","", "wheel_2_4_damper_land","", "wheel_1_1_damper","wheel_1_1_damper_land", "wheel_1_2_damper","wheel_1_2_damper_land", "wheel_1_3_damper","wheel_1_3_damper_land", "wheel_1_4_damper","wheel_1_4_damper_land", "wheel_2_1_damper","wheel_2_1_damper_land", "wheel_2_2_damper","wheel_2_2_damper_land", "wheel_2_3_damper","wheel_2_3_damper_land", "wheel_2_4_damper","wheel_2_4_damper_land", "wheel_1_1_steering","wheel_1_1_damper", "wheel_1_2_steering","wheel_1_2_damper", "wheel_1_3_steering","wheel_1_3_damper", "wheel_1_4_steering","wheel_1_4_damper", "wheel_2_1_steering","wheel_2_1_damper", "wheel_2_2_steering","wheel_2_2_damper", "wheel_2_3_steering","wheel_2_3_damper", "wheel_2_4_steering","wheel_2_4_damper", "wheel_1_1","wheel_1_1_steering", "wheel_1_2","wheel_1_2_steering", "wheel_1_3","wheel_1_3_steering", "wheel_1_4","wheel_1_4_steering", "wheel_2_1","wheel_2_1_steering", "wheel_2_2","wheel_2_2_steering", "wheel_2_3","wheel_2_3_steering", "wheel_2_4","wheel_2_4_steering", "wheel_1_1_unhide","wheel_1_1", "wheel_1_2_unhide","wheel_1_2", "wheel_1_3_unhide","wheel_1_3", "wheel_1_4_unhide","wheel_1_4", "wheel_2_1_unhide","wheel_2_1", "wheel_2_2_unhide","wheel_2_2", "wheel_2_3_unhide","wheel_2_3", "wheel_2_4_unhide","wheel_2_4", "wheel_1_1_hide","wheel_1_1", "wheel_1_2_hide","wheel_1_2", "wheel_1_3_hide","wheel_1_3", "wheel_1_4_hide","wheel_1_4", "wheel_2_1_hide","wheel_2_1", "wheel_2_2_hide","wheel_2_2", "wheel_2_3_hide","wheel_2_3", "wheel_2_4_hide","wheel_2_4", "OtocVez","", "OtocHlaven","OtocVez", "damageHide","", "damageVez","OtocVez", "damageHlaven","OtocHlaven", "ukaz_rychlo","", "ukaz_rychlo2","", "ukaz_rpm","", "mph","", "rpm","", "fuel","", "fuel_1","", "fuel_01","", "fuel_2","", "fuel_3","", "prop_01","", "prop_02","", "prop_2","", "prop_1","", "glass1","damageHide", "glass2","damageHide", "glass3","damageHide", "glass4","damageHide" }; }; class civil_car: Car { skeletonInherit="Car"; skeletonBones[]= { "reverse_light","", "daylights","damageHide", "door1","", "door2","", "glass5","damageHide" }; }; }; class CfgModels { class Default { sectionsInherit = ""; sections[] = {}; skeletonName = ""; }; class Vehicle: Default { sections[] = { "cislo", "grupa", "side", "sektor", "clan", "clan_sign", "podsvit pristroju", "poskozeni", "L svetlo", "P svetlo", "zasleh" }; }; class Car: Vehicle { htMin = 60; // Minimum half-cooling time (in seconds) htMax = 180; // Maximum half-cooling time (in seconds) afMax = 100; // Maximum temperature in case the model is alive (in celsius) mfMax = 8; // Maximum temperature when the model is moving (in celsius) mFact = 1; // Metabolism factor - number from interval <0, 1> (0 - metabolism has no influence, 1 - metabolism has full influence (no other temperature source will be considered)). tBody = 150; // Metabolism temperature of the model (in celsius) sections[]= { "ammo", "zadni svetlo", "brzdove svetlo", "spz", "motor", "body", "clan", "clan_sign", "zasleh", "Light_R", "Light_L", "podsvit pristroju", "glass1", "glass2", "glass3", "glass4", "glass5", "glass6" }; skeletonName="Car"; class Animations { // destruct START class damageHide { type="hide"; source="damage"; selection="damageHide"; hideValue=1.0; }; class damageHideVez:damageHide { selection="OtocVez"; }; class damageHideHlaven:damageHide { selection="OtocHlaven"; }; // Wheels START // Wheels Complete Destruct START class wheel_1_1_destruct { type="hide"; selection="wheel_1_1_hide"; source="HitLFWheel"; minValue = 0; // upravit na 0.99 maxValue = 1; // upravit na 1.0 hidevalue = 0.99999; }; class wheel_1_2_destruct: wheel_1_1_destruct {source="HitLBWheel";selection="wheel_1_2_hide";}; class wheel_1_3_destruct: wheel_1_1_destruct {source="HitLMWheel";selection="wheel_1_3_hide";}; class wheel_1_4_destruct: wheel_1_1_destruct {source="HitLF2Wheel";selection="wheel_1_4_hide";}; class wheel_2_1_destruct: wheel_1_1_destruct {source="HitRFWheel";selection="wheel_2_1_hide";}; class wheel_2_2_destruct: wheel_1_1_destruct {source="HitRBWheel";selection="wheel_2_2_hide";}; class wheel_2_3_destruct: wheel_1_1_destruct {source="HitRMWheel";selection="wheel_2_3_hide";}; class wheel_2_4_destruct: wheel_1_1_destruct {source="HitRF2Wheel";selection="wheel_2_4_hide";}; class wheel_1_1_destruct_unhide { type="hide"; selection="wheel_1_1_unhide"; source="HitLFWheel"; minValue = 0; maxValue = 1; hidevalue = 0.00000; UnHidevalue = 1.00000; }; class wheel_1_2_destruct_unhide: wheel_1_1_destruct_unhide {source="HitLBWheel";selection="wheel_1_2_unhide";}; class wheel_1_3_destruct_unhide: wheel_1_1_destruct_unhide {source="HitLMWheel";selection="wheel_1_3_unhide";}; class wheel_1_4_destruct_unhide: wheel_1_1_destruct_unhide {source="HitLF2Wheel";selection="wheel_1_4_unhide";}; class wheel_2_1_destruct_unhide: wheel_1_1_destruct_unhide {source="HitRFWheel";selection="wheel_2_1_unhide";}; class wheel_2_2_destruct_unhide: wheel_1_1_destruct_unhide {source="HitRBWheel";selection="wheel_2_2_unhide";}; class wheel_2_3_destruct_unhide: wheel_1_1_destruct_unhide {source="HitRMWheel";selection="wheel_2_3_unhide";}; class wheel_2_4_destruct_unhide: wheel_1_1_destruct_unhide {source="HitRF2Wheel";selection="wheel_2_4_unhide";}; // Wheels Complete Destruct END #define DamageOffset 0.2 // Wheels Damage START class wheel_1_1_Damage: wheel_1_1_destruct { type="translation"; axis="Basic_Damper_Destruct_Axis"; memory=1; selection="wheel_1_1_damper"; source="HitLFWheel"; minValue = 0.0; maxValue = 1; offset0 = 0; offset1 = DamageOffset; }; class wheel_1_2_Damage: wheel_1_1_Damage {source="HitLBWheel";selection="wheel_1_2_damper";}; class wheel_1_3_Damage: wheel_1_1_Damage {source="HitLMWheel";selection="wheel_1_3_damper";}; class wheel_1_4_Damage: wheel_1_1_Damage {source="HitLF2Wheel";selection="wheel_1_4_damper";}; class wheel_2_1_Damage: wheel_1_1_Damage {source="HitRFWheel";selection="wheel_2_1_damper";}; class wheel_2_2_Damage: wheel_1_1_Damage {source="HitRBWheel";selection="wheel_2_2_damper";}; class wheel_2_3_Damage: wheel_1_1_Damage {source="HitRMWheel";selection="wheel_2_3_damper";}; class wheel_2_4_Damage: wheel_1_1_Damage {source="HitRF2Wheel";selection="wheel_2_4_damper";}; class wheel_1_1_Damper_Damage_BackAnim: wheel_1_1_Damage {selection="wheel_1_1_damper";offset1 = -1.2*DamageOffset;}; class wheel_1_2_Damper_Damage_BackAnim: wheel_1_1_Damper_Damage_BackAnim {source="HitLBWheel";selection="wheel_1_2_damper";}; class wheel_1_3_Damper_Damage_BackAnim: wheel_1_1_Damper_Damage_BackAnim {source="HitLMWheel";selection="wheel_1_3_damper";}; class wheel_1_4_Damper_Damage_BackAnim: wheel_1_1_Damper_Damage_BackAnim {source="HitLF2Wheel";selection="wheel_1_4_damper";}; class wheel_2_1_Damper_Damage_BackAnim: wheel_1_1_Damper_Damage_BackAnim {source="HitRFWheel";selection="wheel_2_1_damper";}; class wheel_2_2_Damper_Damage_BackAnim: wheel_1_1_Damper_Damage_BackAnim {source="HitRBWheel";selection="wheel_2_2_damper";}; class wheel_2_3_Damper_Damage_BackAnim: wheel_1_1_Damper_Damage_BackAnim {source="HitRMWheel";selection="wheel_2_3_damper";}; class wheel_2_4_Damper_Damage_BackAnim: wheel_1_1_Damper_Damage_BackAnim {source="HitRF2Wheel";selection="wheel_2_4_damper";}; // Wheels Damage END // Wheels END //Glass Damage START class Glass1_destruct { type="hide"; selection="glass1"; source="HitGlass1"; minValue = 0; maxValue = 1; hidevalue = 0.99999; }; class Glass2_destruct: Glass1_destruct {selection="glass2";source="HitGlass2";}; // Inherits from the the glass 1, only the selection and the source will be changed class Glass3_destruct: Glass1_destruct {selection="glass3";source="HitGlass3";}; class Glass4_destruct: Glass1_destruct {selection="glass4";source="HitGlass4";}; class Glass5_destruct: Glass1_destruct {selection="glass5";source="HitGlass5";}; class Glass6_destruct: Glass1_destruct {selection="glass6";source="HitGlass6";}; //Glass Damage END // destruct END class Fuel: Rotation { source="fuel"; selection="fuel"; axis="fuel_axis"; maxValue=1; memory=1; angle0="rad -110"; angle1=0; }; class IndicatorSpeed: Rotation { source="speed"; selection="mph"; axis="mph_axis"; memory=1; maxValue=38.900002; angle1="rad -265"; }; class IndicatorFuel: Rotation { type="rotation"; source="fuel"; selection="fuel_1"; axis="fuel_1_axis"; memory=1; minValue=0.000000; maxValue=1.000000; angle0=-0.087266; angle1=-1.658063; }; class IndicatorRPM: Rotation { source="rpm"; selection="rpm"; axis="rpm_axis"; memory=1; angle1="rad 80"; }; class DrivingWheel: Rotation { source="drivingWheel"; selection="drivewheel"; axis="drivewheel_axis"; minValue=-1; maxValue=1; angle0=(rad 80); angle1=(rad -80); }; class Steering_1_1 { type="rotationY"; source="drivingWheel"; selection="wheel_1_1_steering"; axis="wheel_1_1_steering_axis"; memory=1; minValue= -1; maxValue= 1; angle0=1.047198; angle1=-1.047198; }; class Steering_2_1: Steering_1_1 { selection="wheel_2_1_steering"; axis="wheel_2_1_steering_axis"; }; class Wheel_1_1 { type="rotationX"; source="wheel"; selection="wheel_1_1"; axis="wheel_1_1_axis"; memory=1; sourceAddress="loop"; minValue=0; maxValue=1; angle0=0; angle1="rad -360"; }; class wheel_2_1: Wheel_1_1 { selection="wheel_2_1"; axis="wheel_2_1_axis"; }; class wheel_1_2: Wheel_1_1 { selection="wheel_1_2"; axis="wheel_1_2_axis"; }; class wheel_1_3: Wheel_1_1 { selection="wheel_1_3"; axis="wheel_1_3_axis"; }; class Wheel_2_2: Wheel_1_1 { selection="wheel_2_2"; axis="wheel_2_2_axis"; }; class Wheel_2_3: Wheel_1_1 { selection="wheel_2_3"; axis="wheel_2_3_axis"; }; class Wheel_1_4: Wheel_1_1 { selection="wheel_1_4"; axis="wheel_1_4_axis"; }; class Wheel_2_4: Wheel_1_1 { selection="wheel_2_4"; axis="wheel_2_4_axis"; }; class Wheel_1_1_Damper { type="translation"; source="damper"; selection="wheel_1_1_damper_land"; axis="posun wheel_1_1"; animPeriod = 1; minValue="0"; maxValue="1"; offset0= "0.5"; offset1= "-0.5"; memory=1; }; class wheel_2_1_Damper: Wheel_1_1_Damper { selection="wheel_2_1_damper_land"; }; class wheel_1_2_Damper: Wheel_1_1_Damper { selection="wheel_1_2_damper_land"; }; class Wheel_2_2_Damper: Wheel_1_1_Damper { selection="wheel_2_2_damper_land"; }; class daylights { type="hide"; source="rpm"; selection="daylights"; minValue=-0.8; maxValue=0.2; unhidevalue=1; sourceAddress="clamp"; }; class reverse_light { type="Hide"; selection="reverse_light"; sourceAddress="clamp"; source="Gear"; minValue = -1; maxValue = 0; hideValue = "0.2"; }; }; }; class Test_Car_01: Car { skeletonName = "civil_car"; sectionsInherit = "Car"; sections[]= { "Camo1", "Camo2", "Camo3", "body", "karoserie", "palivo" }; class Animations: Animations { class wheel_1_1_Damage: wheel_1_1_Damage{offset1=0.18000001;}; class wheel_1_2_Damage: wheel_1_2_Damage{offset1=0.18000001;}; class wheel_2_1_Damage: wheel_2_1_Damage{offset1=0.18000001;}; class wheel_2_2_Damage: wheel_2_2_Damage{offset1=0.18000001;}; class wheel_1_1_Damper_Damage_BackAnim: wheel_1_1_Damper_Damage_BackAnim{offset1=-0.18000001;}; class wheel_1_2_Damper_Damage_BackAnim: wheel_1_2_Damper_Damage_BackAnim{offset1=-0.18000001;}; class wheel_2_1_Damper_Damage_BackAnim: wheel_2_1_Damper_Damage_BackAnim{offset1=-0.18000001;}; class wheel_2_2_Damper_Damage_BackAnim: wheel_2_2_Damper_Damage_BackAnim{offset1=-0.18000001;}; class DrivingWheel { type="rotation"; source="drivingWheel"; selection="drivewheel"; axis="drivewheel_axis"; memory=1; minValue=-1; maxValue=1; angle0=(rad -70); angle1=(rad 70); }; class Steering_1_1 { type="rotationY"; source="drivingWheel"; selection="wheel_1_1_steering"; axis="wheel_1_1_steering_axis"; memory=1; minValue="rad -90"; maxValue="rad +90"; angle0=1.0471981; angle1=-1.0471981; }; class Steering_2_1: Steering_1_1 { selection="wheel_2_1_steering"; axis="wheel_2_1_steering_axis"; angle0=1.0471981; angle1=-1.0471981; }; class IndicatorSpeed: Rotation { source="speed"; selection="mph"; axis="mph_axis"; memory=1; maxValue=28; angle0=0.17453299; angle1=-3.141593; }; class IndicatorRPM: Rotation { type="rotation"; source="rpm"; selection="rpm"; axis="rpm_axis"; memory=1; minValue=0; maxValue=7500; angle0=(rad 0); angle1=(rad 250); }; class fuel { type="rotation"; source="fuel"; selection="fuel"; axis="fuel_axis"; memory=1; minValue=0; maxValue=1; angle0=0; angle1="rad +55"; }; class prop_01 { type="rotation"; source="rpm"; selection="prop_1"; axis="prop_1_axis"; memory=1; minValue=1000; maxValue=7000; angle0="rad 30"; angle1="rad 35"; }; class daylights { type="hide"; source="rpm"; selection="daylights"; minValue=-0.8; maxValue=0.2; unhidevalue=1; sourceAddress="clamp"; }; class reverse_light { type="Hide"; selection="reverse_light"; sourceAddress="clamp"; source="Gear"; minValue = -1; maxValue = 0; hideValue = "0.2"; }; class damageHidedoor1: damageHide { selection="door1"; }; class damageHidedoor2: damageHide { selection="door2"; }; class Glass5_destruct { type="hide"; selection="glass5"; source="HitGlass5"; minValue = 0; maxValue = 1; hidevalue = 0.99999; }; class Wheel_1_1_Damper: Wheel_1_1_Damper { type="translation"; source="damper"; selection="wheel_1_1_damper_land"; axis="posun wheel_1_1"; animPeriod = 1; minValue="0"; maxValue="1"; offset0= "0.5"; offset1= "-0.5"; memory=1; }; class wheel_2_1_Damper: Wheel_1_1_Damper { selection="wheel_2_1_damper_land"; }; class wheel_1_2_Damper: Wheel_1_1_Damper { selection="wheel_1_2_damper_land"; }; class Wheel_2_2_Damper: Wheel_1_1_Damper { selection="wheel_2_2_damper_land"; }; }; }; };
-
Good day, I have got a little problem with a custom optic I am trying to get ingame for a mod I am working on. The optic has a round .p3d model with a texture applied correctly. However, ingame, it works as if it were magnified like x10..? Here some screens and how I defined the optics in the config: This is what it should look like: http://i180.photobucket.com/albums/x230/ArTaNiSS_2007/besaOptic_zpsayfbzduc.jpg This is what you see: http://i180.photobucket.com/albums/x230/ArTaNiSS_2007/20170113105129_1_zpsuqkrzvd6.jpg And this is the UV layout in O.B: http://i180.photobucket.com/albums/x230/ArTaNiSS_2007/Sin ttulo-1_zpsmww2t4q3.jpg Here the config: class RCWSOptics; class crusader_commander_optics { class Wide: RCWSOptics { initFov="(36 / 120)"; minFov="(36 / 120)"; maxFov="(36 / 120)"; visionMode[]= { "Normal" }; //thermalMode[]={2,3}; gunnerOpticsModel="\7Y_weapons\optics\crusader_commander.p3d"; gunnerOpticsEffect[]={}; }; class Medium: Wide { initFov="(150 * 0.05625 / 120)"; minFov="(150 * 0.05625 / 120)"; maxFov="(150 * 0.05625 / 120)"; }; class Narrow: Medium { initFov="(60 * 0.05625 / 120)"; minFov="(60 * 0.05625 / 120)"; maxFov="(60 * 0.05625 / 120)"; }; }; Then in the cfgVehicle I have this: discreteDistance[]={10,50,100,150,200,300,500,750}; discreteDistanceInitIndex=2; gunnerOpticsModel="\7Y_weapons\optics\crusader_commander"; gunnerOutOpticsModel=""; gunnerOpticsEffect[]={}; showgunneroptics = 1; gunnerAction="passenger_generic01_foldhands"; //mbt2_slot2a_in gunnerInAction="passenger_generic01_foldhands"; //passenger_low01, passenger_generic01_leanleft, passenger_generic01_foldhands gunnerForceOptics = 1; gunnerCanSee = 31; class OpticsIn { class Main { useModelOptics = 1; gunnerOpticsModel = "\7Y_weapons\optics\crusader_commander"; gunnerOpticsEffect[] = {"TankGunnerOptics2","OpticsBlur1","OpticsCHAbera1"}; initAngleX = 0; minAngleX = -100; maxAngleX = 100; initAngleY = 0; minAngleY = -360; maxAngleY = 360; initFov = 0.4; minFov = 0.1; maxFov = 0.9; memoryPointGunnerOptics = "usti Hlavne3"; visionMode[] = {"Normal"}; opticsFlare = 1; opticsDisablePeripherialVision = 1; cameraDir = ""; }; }; class ViewOptics { initAngleX = 0; minAngleX = -70; //-5 maxAngleX = 60; //45 initAngleY = 0; //0 minAngleY = -20; //-20 maxAngleY = 40; //20 initFov = 0.4; minFov = 0.1; maxFov = 0.9; visionMode[]= {"Normal"}; }; class ViewGunner { initAngleX = 0; minAngleX = -100; maxAngleX = 50; initAngleY = 0; minAngleY = -20; maxAngleY = 20; initFov = 0.4; minFov = 0.1; maxFov = 0.9; visionMode[]= {"Normal"}; //thermalMode[]={4,5}; }; I have searched on the forums for anything related with optics, however the nearest I got to my problem was with a post about some Sanchez, but no joy in the end. I have tweaked the Fov values some times, but the only thing I achieve is getting in more/less zoom, without actually changeing the actual size of the optic. Thanks in advance for your time, Loki.
-

Workshop Missions and Mods - What can missions/mods execute?
pierreofthefrench posted a topic in ARMA 3 - QUESTIONS & ANSWERS
Hi all, I've poked around with missions scripting in the past, but I'm really looking for a concrete answer on this. I love modding and mods in general for all games, but, as a software engineer myself, I tend to get a bit paranoid of what I install / grant permissions to. When I download an Arma3 Mission or Mod, what kind of things can these do? ie. Execute .exes, include and reference compiled c++? I know that mission files are .pbo, which contain an arma scripting language, which limits itself to functionality supported by the engine. However, I've always seen a lot of references to compiled C++ code. Some mods (like Breaking Point) seem to do a lot more than just script together some gameplay behaviors so I can only assume it does a bit more than just scripting language things. Looking through the CUPs addons and BattleRoyale, I only see .pbos and a few other non-code/binaries. Are there particular restrictions on mods vs missions, how can I tell if they're trying to install/execute binaries or arbitrary code? Any insight would be greatly appreciated. -

Dynamix - Random Unit Spawn System
X Pro Octane posted a topic in ARMA 3 - MISSION EDITING & SCRIPTING
Dynamix I'll try to keep this thread as short as I find suitable and on point. No promises... I'll start with giving ya'll little background on the system. I've been developing this script for a good many weeks now, and have come up with what I'm calling the Dynamix System. The system is a set of only a few scripts that act quite similar to EOS, but are structured much differently to allow the beloved functionality to be presented in a very up-to-date and optimized manner. This is actually my first script I'm releasing to the public, so please expect bugs that need squished. Prior to me creating the script, I barely had any SQF know-how. The only knowledge that I had was of JavaScript, which seemed to be the most relatable language. I went ahead and found up the BI Wiki, and spent a good bit of my time to create this puppy. The system has went through some of my very "newbie" stages of development, such as where I had first implemented a matrix system to handle marker and unit status, but I found that to be obsolete after I matured it into simply getting the status from the map, and not throwing around the amount of enemies for each marker from the client and server. Performance Demo As I continued to roam around in the demo video, you could clearly tell that the system was performing at a pretty swell level. Apologies that the FPS wasn't overlayed for you to watch, but I can admit it was a constant 50+ frames - despite all of those active enemy AI and the DS being ran on the same machine. Now, please take in mind that my system is not built for something as bada## as Arma 3. Or, at least I would say it isn't. OS : Windows 7 Ultimate 64-Bit Motherboard : MSI 970A-G43 AM3 ATX GPU : AMD R9 270 925MHz 2GB GDDR5 (Crimson ReLive Software Version 16.12.1) CPU : AMD FX-6300 (Six-Core) 3.5GHz (Overclocking to 4.19GHz (Yes, the damn thing is stable)) Memory : Kingston HyperX Fury 240-pin (2x4)GB DDR3 (Overclocking to 1866 w/ HyperTransport) Storage : (OS Internal) Seagate HDD 1TB 64MB Cache, (Secondary Internal (Arma 3 Installed Here)) Samsumg EVO 850 250GB Last thing to note and wrap up this section is that over the time that I've been developing this, I made only one hardware upgrade, and that is the SSD (my very first). I can assure you that while I was still developing this system in the early days of my little HDD, it performed only slightly worse than it does today. I find this difference to be insignificant, because the margin of performance from system-to-system varies regardless, so it wouldn't much matter under certain conditions. Features Smooth AI spawning Marker status changes are logged Many editable variables Markers don't unload units Enemies occupy buildings Vehicle spawning Editable unit spawn banks An up-to-date system Open to suggestions Fully explained system Works with SP and MP Only 4kb's How-It-Works It actually works in a fairly simple to understand route. I'll just list out the main steps below. The server either sequentially generates all the marker names to report, or it reads them from a manual bank. It applies to all of the valid ones a certain "initial" color, and logs the invalid ones for debugging. Every X seconds, players will report their object, appropriate marker status colors to be applied, and load distance to the server. The server compares these values to every marker, and activates, captures, or recaptures those whom meet certain conditions. Considering an initialized marker needs to be loaded, it runs another thread that spawns the enemies. From the numbers 2 to 5, are generated units from a set enemy bank. The server takes a break after every unit spawned to reduce stuttering. For every building within a marker, is a chance to occupy a building with a single unit. A break is taken inside this as well. Finally, if there is a road inside a marker, there will be a chance that an enemy vehicle will spawn on that road. A break is taken inside this as well. Let's consider only 2/3 units have been neutralized inside our marker, so we'll look at this comparison. The capture comparison is based off of player knowledge to whether the square is clear or not. Even if an enemy is still inside a square, but the player doesn't know about them, it turns blue. This prevents players from cheating by observing a squares status to see if enemies still occupy it. That wraps the system up... Downloads There is a readme.txt inside the folder that you can take a look at. I've got a heap of comments inside the main script for you to take a look at how to configure the script. This is a personal agreement, where I state that you ONLY redistribute this system under the conditions that you apply proper attribution to all contributing authors, and a link to this OP. MediaFire - V11.8 Took me two whole hours to write this damn thread where I could have been playing Arma all that time, so I hope I covered everything. Enjoy! If you find bugs, I suppose you know what to do. -
Feel free to download & use :) http://imgur.com/a/Jmifs
-
Hi all im having a minor issue with a helmet i'm currently working on. I pack the pbo fine and all that jazz but once im in game i get an error saying the p3d cannot be opened. The p3d is all original, as in i own it and made it from scratch. Iv'e made a few vehicles in the past but was wondering if anyone has an idea why the helmet won't open. Also on a side note i reduced the vert count to about 400 verts and still no joy. This is my config.cpp class CfgPatches { class Irishs_Gear { units[] = {}; weapons[] = {}; requiredVersion = 0.1; requiredAddons[] = {}; }; }; class cfgWeapons { class ItemCore; /// External class reference class InventoryItem_Base_F; /// External class reference class HeadgearItem : InventoryItem_Base_F { allowedSlots[] = {901, 605}; /// defines where can be the cap placed, it is small enough to fit in backpack type = 605; /// standard slot for the cap is on head hiddenSelections[] = {}; /// default caps don't have any changeable selections hitpointName = "HitHead"; /// what hitpoint is covered with the cap to have additional protection }; class MK6 : ItemCore { scope = 2; weaponPoolAvailable = 1; displayName = "Mk6 Jungle Warfare"; picture = "\A3\characters_f\Data\UI\icon_H_HelmetB_CA.paa"; model = "\MK6_Helmet\Mk6"; class ItemInfo : HeadgearItem { mass = 10; uniformModel = "\MK6_Helmet\Mk6"; modelSides[] = {3, 1}; armor = 3*0.5; passThrough = 0.8; }; }; }; This is my model.cfg class CfgSkeletons { class Default { isDiscrete = 1; skeletonInherit = ""; skeletonBones[] = {}; }; class OFP2_ManSkeleton { isDiscrete = 0; skeletonInherit = ""; skeletonBones[] = { "Pelvis","", "Spine","Pelvis", "Spine1","Spine", "Spine2","Spine1", "Spine3","Spine2", "Camera","Pelvis", "weapon","Spine1", "launcher","Spine1", //Head skeleton in hierarchy "neck","Spine3", "neck1","neck", "head","neck1", //New facial features "Face_Hub","head", "Face_Jawbone","Face_Hub", "Face_Jowl","Face_Jawbone", "Face_chopRight","Face_Jawbone", "Face_chopLeft","Face_Jawbone", "Face_LipLowerMiddle","Face_Jawbone", "Face_LipLowerLeft","Face_Jawbone", "Face_LipLowerRight","Face_Jawbone", "Face_Chin","Face_Jawbone", "Face_Tongue","Face_Jawbone", "Face_CornerRight","Face_Hub", "Face_CheekSideRight","Face_CornerRight", "Face_CornerLeft","Face_Hub", "Face_CheekSideLeft","Face_CornerLeft", "Face_CheekFrontRight","Face_Hub", "Face_CheekFrontLeft","Face_Hub", "Face_CheekUpperRight","Face_Hub", "Face_CheekUpperLeft","Face_Hub", "Face_LipUpperMiddle","Face_Hub", "Face_LipUpperRight","Face_Hub", "Face_LipUpperLeft","Face_Hub", "Face_NostrilRight","Face_Hub", "Face_NostrilLeft","Face_Hub", "Face_Forehead","Face_Hub", "Face_BrowFrontRight","Face_Forehead", "Face_BrowFrontLeft","Face_Forehead", "Face_BrowMiddle","Face_Forehead", "Face_BrowSideRight","Face_Forehead", "Face_BrowSideLeft","Face_Forehead", "Face_Eyelids","Face_Hub", "Face_EyelidUpperRight","Face_Hub", "Face_EyelidUpperLeft","Face_Hub", "Face_EyelidLowerRight","Face_Hub", "Face_EyelidLowerLeft","Face_Hub", "EyeLeft","Face_Hub", "EyeRight","Face_Hub", //Left upper side "LeftShoulder","Spine3", "LeftArm","LeftShoulder", "LeftArmRoll","LeftArm", "LeftForeArm","LeftArmRoll", "LeftForeArmRoll","LeftForeArm", "LeftHand","LeftForeArmRoll", "LeftHandRing","LeftHand", "LeftHandRing1","LeftHandRing", "LeftHandRing2","LeftHandRing1", "LeftHandRing3","LeftHandRing2", "LeftHandPinky1","LeftHandRing", "LeftHandPinky2","LeftHandPinky1", "LeftHandPinky3","LeftHandPinky2", "LeftHandMiddle1","LeftHand", "LeftHandMiddle2","LeftHandMiddle1", "LeftHandMiddle3","LeftHandMiddle2", "LeftHandIndex1","LeftHand", "LeftHandIndex2","LeftHandIndex1", "LeftHandIndex3","LeftHandIndex2", "LeftHandThumb1","LeftHand", "LeftHandThumb2","LeftHandThumb1", "LeftHandThumb3","LeftHandThumb2", //Right upper side "RightShoulder","Spine3", "RightArm","RightShoulder", "RightArmRoll","RightArm", "RightForeArm","RightArmRoll", "RightForeArmRoll","RightForeArm", "RightHand","RightForeArmRoll", "RightHandRing","RightHand", "RightHandRing1","RightHandRing", "RightHandRing2","RightHandRing1", "RightHandRing3","RightHandRing2", "RightHandPinky1","RightHandRing", "RightHandPinky2","RightHandPinky1", "RightHandPinky3","RightHandPinky2", "RightHandMiddle1","RightHand", "RightHandMiddle2","RightHandMiddle1", "RightHandMiddle3","RightHandMiddle2", "RightHandIndex1","RightHand", "RightHandIndex2","RightHandIndex1", "RightHandIndex3","RightHandIndex2", "RightHandThumb1","RightHand", "RightHandThumb2","RightHandThumb1", "RightHandThumb3","RightHandThumb2", //Left lower side "LeftUpLeg","Pelvis", "LeftUpLegRoll","LeftUpLeg", "LeftLeg","LeftUpLegRoll", "LeftLegRoll","LeftLeg", "LeftFoot","LeftLegRoll", "LeftToeBase","LeftFoot", //Right lower side "RightUpLeg","Pelvis", "RightUpLegRoll","RightUpLeg", "RightLeg","RightUpLegRoll", "RightLegRoll","RightLeg", "RightFoot","RightLegRoll", "RightToeBase","RightFoot" }; // location of pivot points (local axes) for hierarchical animation pivotsModel="A3\anims_f\data\skeleton\SkeletonPivots.p3d"; }; }; class CfgModels { class Default { sectionsInherit=""; sections[] = {}; skeletonName = ""; }; class ArmaMan : Default { htMin = 60; // Minimum half-cooling time (in seconds) htMax = 1800; // Maximum half-cooling time (in seconds) afMax = 30; // Maximum temperature in case the model is alive (in celsius) mfMax = 0; // Maximum temperature when the model is moving (in celsius) mFact = 1; // Metabolism factor - number from interval <0, 1> (0 - metabolism has no influence, 1 - metabolism has full influence (no other temperature source will be considered)). tBody = 37; // Metabolism temperature of the model (in celsius) sections[] = { "osobnost","Head_Injury","Body_Injury","l_leg_injury","l_arm_injury","r_arm_injury","r_leg_injury","injury_body", "injury_legs", "injury_hands", "clan","clan_sign","Camo","CamoB","Camo1","Camo2","personality","hl", "injury_head" }; skeletonName = "OFP2_ManSkeleton"; }; class Irishs_Gear : ArmaMan{}; }; Any help anyone can give will be greatly appreciated.