jw custom 56 Posted October 9, 2015 Very nice warden_1 B) Share this post Link to post Share on other sites
RhodesianScout 189 Posted October 9, 2015 I know you haven't started modelling gear yet, but I would like to say that there is a severe shortage of realistic insurgent vests and/or chest webbings in the ArmA3 community! Are you planning on adding a bunch of vests? Because they're really needed imho! Yes it is true that I have not got to the stage of modelling gear yet but I am definitely going to be adding gear for ZANU and ZAPU insurgents as well as the vests and webbings for the Rhodesian Infantry. I still need to research what webbing and vests the insurgents were wearing ....( not easy to find) during the Bush War but the next series of posts show the webbing and gear pictures I have planned for the Rhodesian Infantry. Share this post Link to post Share on other sites
RhodesianScout 189 Posted October 9, 2015 The items in the pictures are are not exact copies as former Rhodesian and military uniforms and kit are illegal in Zimbabwe. They are however original Feredays products and are suitable for the mod. Feredays 4-Cell Chest Webbing (AK-Galil-R4) - Rhodesian Style Webbing_ Rhodesian Fereday and Sons 4-Cell Chest Webbing Rhodesian Pattern 69 Double Magazine Pouch Rhodesian Pattern 69 Water Bottle Carrier Rhodesian Pattern 69 General Purpose Pouch Share this post Link to post Share on other sites
RhodesianScout 189 Posted October 9, 2015 An overall picture of the above with the Rhodesian Army shirt and hat included. Share this post Link to post Share on other sites
RhodesianScout 189 Posted October 9, 2015 For creating the vests and webbings for the insurgents these are the source pictures I have so far for ZAPU and ZANU Share this post Link to post Share on other sites
RhodesianScout 189 Posted October 9, 2015 Wanted to try my hand at structural modelling and so I attempted to make one of those rondavel things... didn't end up the best but hopefully you can find a use for it: http://www.mediafire.com/download/hs3zmgdvi3bg2a2/rondavel.zip http://imgur.com/a/MCxQh Warden_1 That is a pretty good job at creating a rondavel....... very nice. I see you have included the ambient map and meshnormal to your model....... that is something I had not got around to as yet. My model looked a little bland because all I had so far was the base texture. I do like what you have done there.....have downloaded it and will look at it in the next few days. 1 Share this post Link to post Share on other sites
RhodesianScout 189 Posted October 9, 2015 Yeah there are one or two models of mediocre quality and only one of good quality afaik. That's not enough, but yes definitely also fire force vests If the models are out there but the quality of the textures are not great, I do recommend having a look on ebay to see if there are pictures for that particular vest or webbing. For example, here is a picture for 303 ENFIELD THREE AMMO WEBBING POUCH - WW2 GENUINE BRITISH ARMY Share this post Link to post Share on other sites
warden_1 1070 Posted October 9, 2015 Warden_1 That is a pretty good job at creating a rondavel....... very nice. I see you have included the ambient map and meshnormal to your model....... that is something I had not got around to as yet. My model looked a little bland because all I had so far was the base texture. I do like what you have done there.....have downloaded it and will look at it in the next few days. Enjoy :) Share this post Link to post Share on other sites
bullsh 22 Posted October 10, 2015 If the models are out there but the quality of the textures are not great, I do recommend having a look on ebay to see if there are pictures for that particular vest or webbing. For example, here is a picture for 303 ENFIELD THREE AMMO WEBBING POUCH - WW2 GENUINE BRITISH ARMY It is more that the models themselves are either a bit poor or don't fit the player models very well. I found some more insurgent vests in the meantime but they're all part of other, bigger, mods. I'm thinking of having a look at modelling some insurgent style vests myself, maybe releasing them in a seperate mod open for the public to use for their own mods. You said you had looked into a decent amount of tutorials for modding I think, could you please point me towards the tutorial that helped you most with your modelling and/or texturing? Share this post Link to post Share on other sites
RhodesianScout 189 Posted October 11, 2015 During a patrol through the bush, the Rhodesian Light Infantry come across the rusted wreck of a car half submerged in the river. With reports of ZAPU in the area, the area needs to be checked for land mines or other explosive material. With the main road to Umtali only a few metres north and a local village nearby this is a likely site for landmines targeting locals coming down to the river. In the picture below you will see the first look at a double trunk baobab tree. Share this post Link to post Share on other sites
RhodesianScout 189 Posted October 11, 2015 It is more that the models themselves are either a bit poor or don't fit the player models very well. I found some more insurgent vests in the meantime but they're all part of other, bigger, mods. I'm thinking of having a look at modelling some insurgent style vests myself, maybe releasing them in a seperate mod open for the public to use for their own mods. You said you had looked into a decent amount of tutorials for modding I think, could you please point me towards the tutorial that helped you most with your modelling and/or texturing? My experience with creating models for Arma 3 is that not one tutorial by itself really helped me create the object I first created for the mod....... depending on what you are trying to create you might need to go through various tutorials to learn how to model. In your case you are looking to create vests and my advice would be to go as follows: 1. Make sure you are familiar with Blender or 3dsmax , photoshop, gimp......which ever software you are using. If is hard enough to create a model the first time around if you are not familiar with the paint software or the modelling software you choose. 2. Before making your own models it is always a better option to look at existing models and see how they have been textured. 3. Go to youtube and have a look at AstartesGaming at https://www.youtube.com/playlist?list=PLpqkCjhP2qY1ChOfC7d3R19owiq1nUSQq He has 5 tutorials in his playlist and the first 3 are pretty good to go through. First tutorial is about retexturing an existing model Second tutorial is specifically about retexturing helmets and vests Third tutorial is about the RVMAT files Once you have gone through these you can have a go at creating the models from scratch...... Share this post Link to post Share on other sites
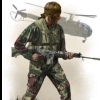
RhodesianScout 189 Posted October 11, 2015 One of the great things about Arma 3 is the difficulty at times to see your enemy and some times you just wish they were wearing something bright red so you can see where they are shooting you from. In the Rhodesia Bush Wars Mod I will be attempting to recreate the effectiveness the Rhodesian camouflage pattern has in blending the soldier into the background. To show how effective the camouflage was have a look in the real world picture below and see if you can spot the soldier wearing the Rhodesian camouflage. I will reveal his position in 12 hours time. Share this post Link to post Share on other sites
smokedog3para 365 Posted October 11, 2015 Have a word with fields he worked on bush wars way back in A1 times im sat on some objects that were used on the terrains back then would fit right in and save you some work all standalone plants trees and objects. Share this post Link to post Share on other sites
RhodesianScout 189 Posted October 11, 2015 Looking at the picture below, the image on the left shows the soldier perfectly camouflaged with the background foliage and then he moves out of position to be slightly more visible as seen in the right hand image. I have put a red square around where he is because even here he is still pretty much camouflaged with the background and not so easy to see. When I was in Rhodesia I was trained in how to make the most of camouflage as well as moving around without making a noise...... in other words how to step on leaves without making a noise. As mentioned in my last post I am designing the map to try and recreate this camouflage. The picture also gives an idea how some of the bush will look with small areas of water among the trees and a lot of cover where enemy soldiers may be hiding. 1 Share this post Link to post Share on other sites
RhodesianScout 189 Posted October 13, 2015 As I have not been there for a while I need to refresh my memory on how different areas look. For example driving down the road as seen below you will see huge baobab trees along the side of the road, each baobab taller than any other tree as far as the eye can see. Looking further down the road and you see another baobab almost twice as high as other trees around it.......this makes baobabs easy to spot. Another area you will be crossing a dry river bed with thorn bushes on either side of you. Yet another area will have lots of grass, a few bushes here and there and one or two trees in any particular direction. I am modelling the trees and bushes and will have about 5 to 10 different baobab trees with weaver birds nests in the tree similar to what is shown below. 1 Share this post Link to post Share on other sites
RhodesianScout 189 Posted October 14, 2015 I did not get to do too much on the mod since my last post........ real life work got in the way again. I should be able to work full time on the mod for at least the next 4 days. In the mean time I will show you a preview of one object I created a few days ago and the before and after pictures showing what was required to get the final texture for the model. Before After Removing the car from the picture was fairly simple, but there were a couple of areas of the picture which took a little longer to do. For example, the 3 food pictures on the right side of the door needed to be reconstructed after removing the blue pole from in front of the pictures. In effect I had to restore what was hidden behind the car and the blue poles and I am actually pretty happy with the results as the food pictures look like they had never been obstructed in the first place. A large part of the blue wall had to be repainted........for example the texture quality of the wall on the left side of the picture had lost detail and needed to be repainted to match the rest of the wall. Removed the Anadin posted which was almost totally blocked by the car and restore the building detail once hidden by the car. After completing the front of the shop I then created textures for the back and the side walls....thankfully that did not take too long. Added the red corrugated roof and then added the advertising sign above the shop and created a new texture for the back of the sign. Then created the metal poles attaching the back of the sign to the roof. At the start it looked like a fairly simple object to build....but a few bits and pieces made it a little more challenging to complete. Share this post Link to post Share on other sites
old_painless 182 Posted October 14, 2015 Is the bottom picture in-game? If so, that is impressive! Share this post Link to post Share on other sites
RhodesianScout 189 Posted October 14, 2015 Is the bottom picture in-game? If so, that is impressive! I will be showing the shop in game sometime over the weekend or Monday / Tuesday......... I need to add a 2nd room inside.....change the wallpaper inside....doesn't look too great at the moment........and do some testing. But this is a shot of it in development to give you an idea what it should look like...the roof had not been added when I took this picture. Roofs are probably the hardest thing to do with buildings...unless you are dealing with a flat roof building. I also need to increase the length of the building out front a little bit more........ but its almost complete. Before I finish I also need to add some weathering to the building to make it look a little more worn done.......... plus add the doors to get inside the building. Have not created a model with open-able doors yet so doing some research on it today. Unfortunately in the game you will not be able to buy fish and chips here......... the civilian shop owner will be inside to greet you and there is always a chance an armed terrorist is hiding inside as well. EDIT : I made some small changes to the model and have updated the picture below. Changed the dimensions of the building, added a ground plane for visual , made some small alterations to the signage and some other tweaks. I have also decided to give this model a flat roof. This is because I will be adding a ladder on the side of the building allowing you to climb onto the roof. This will allow you to sneak up on an enemy hidden behind the building or where an enemy has set up an ambush for your team of soldiers. 1 Share this post Link to post Share on other sites
Cole_ 13 Posted October 15, 2015 I am by no means experienced or good at texturing, but it is a bad idea to directly sample your textures like that. The blue concrete can be easily created with a flat colour and normal map, lattice work for the fly screen bars can be made in Photoshop, even the text on the sign would look better if it was text made in Photoshop (clearer). The gutter on the side of the roof could also be modelled, a dirt alpha and some reflective specularity could make that look very nice. By all means take some artistic license as well, the general shape of the building/posters on the wall don't need to look exactly like your source photographs. 1 Share this post Link to post Share on other sites
RhodesianScout 189 Posted October 15, 2015 84 days I purchased ARMA 3 and yesterday was my 40th day in work on this mod.....it took me 10 days to work out how to create the terrain for the mod.....still work to do to perfect this but making good progress here. Thanks to Silola who is working on Terrain "X-Cam-Taunus" for his handy tips and help he has given me. 29 days ago I realized that I need to make the objects for my mod and started looking for tutorials on how to do this . To have this mod looking like the way I have envisioned it there is no alternative but to make custom objects for the mod........ the frustrating thing with this is that a simple model I started 29 days ago is still to be completed. It took 15 minutes to create the model but 29 days and counting for me in my attempt to get it working correctly in Arma 3...still on going. I have created 12 more objects which are in the queue behind the first one all waiting for me to work out how to get them into Arma 3. The frustrating thing with modding for Arma 3 is trying to find tutorials ....example ...how to build a house in Arma 3. I can find tutorials on how to build weapons and do animations but to find something as simple as a house and get it into Arma 3 ....... apparently non existent. Yes there are tutorials on how to add boxes to Arma 3 but what I need is how to add houses where you have doors that can be opened and closed, same with windows, glass in the windows and some doors that can be shot out.......... There is no way to look at a binarized p3d file as a read only so I can see how others have created their objects....this would be a great way for people to learn how to create objects and being read only would protect the rights of the owner of the object you are looking at. However this is not possible. With the shop model from my last post I do get it that there are different ways to create objects and texture them. cole_2ndcr points out it is a bad idea to directly sample your textures like that....however why this is a bad idea is not explained in any tutorial. Perhaps doing it this way causes frame rate issues but until I can get a model successfully into arma 3 without one issue or another it is hard for me to test. There may also be a 10 golden rules on how to add objects to Arma 3 but I have not seen it yet. With the model shown in my last post it is the early version "2D" alpha version ....... I only put the image in there in reply to a question from old_painless and it is certainly not the finished version of the model. When this shop is completed it will have guttering...a working fly screen door.....edges to the windows and doors......custom interior....applying dirt alpha and reflective specularity where needed....... It has been 10 years since I last created objects so I need to remember how all this works again. One of the reasons I have textured the shop this way is that this seems to be used in the "Community Upgrade Project - CUP_Terrains" (see the picture below ) and seems to be the best way to get the model looking the way I want. Once I get the model showing in Arma 3 and I run tests I may have to change how things are done. With my objects I am aiming to have the object looking like the source photo......the reason will be explained as this project progresses. As mentioned before, the reason I went this way is by looking at various objects in the Community Upgrade Project...sample picture below...... which seems to show the look I am after for my objects. Obviously an object with a texture like this would have no working doors or windows. Not all the buildings I am going to design can be entered so using this texture with closed windows and doors would be acceptable....... but with buildings that you can enter the method I have planned I would have the doors and windows working and with windows with glass that can be seen through and broke by weapons fire etc. Texture from one of the objects in CUP. 2 Share this post Link to post Share on other sites
warden_1 1070 Posted October 16, 2015 You should do some simple tutorials on creating basic objects and then texturing and UVing otherwise you won't understand why you need to do certain things to the model. I learned a lot by doing simple models to understand the workflow. Your blue building texture would be hard to do because there are a lot of objects and normal mapping that would be annoying unless you created them all. Converting a bitmap to a normal usually doesn't work that great for complex images. Share this post Link to post Share on other sites
RhodesianScout 189 Posted October 17, 2015 Rhodesia Bush War........... I have reverted back to a map size of 102km x 102km for the map as some of the missions will involve Alouette III helicopters and Canberra Bombers and the larger map size will better suit the missions I have planned. The map ranges from a height of 1244 metres to 1526 metres above sea level and covers an area known as the Matopos National Park which is 424 square km in size and is found 40 km south of Bulawayo. While it is 424 square km I will be covering a quarter of it in the map. I have chosen the area because I know it very well and it is the perfect place for fire fights with ZAPU and ZANU terrorists.... plenty of hills, trees and water to make this an interesting map. The picture below shows Maleme Dam (pronounced Maleemee Dam) which will be the largest area of water seen in the map. If you camp by Maleme and leave a fire burning at night the hippos will come out out of the water and trample the fire out during the night. I will be trying to create the following scene in the map as close as possible. Share this post Link to post Share on other sites
RhodesianScout 189 Posted October 17, 2015 Granite kopjes and other hills in the map with large boulders and caves providing shelter and places of hiding. The kopje Malindidsimu, called the Worlds View and where Cecil John Rhodes is buried is also in the map. 1 Share this post Link to post Share on other sites
RhodesianScout 189 Posted October 17, 2015 In this part of Rhodesia there are many shallow caves among the hills looking down on the valleys....many of these caves being no more than 10 feet into the rock face. These shallow caves will be added to the map to provide lookout posts and sniper positions with plenty of cover. The one mission I have planned starts outside one cave where you look down onto a valley thick with green trees and see a column of smoke spiraling up from the trees. A terrorist camp or maybe just local campers who have not put their camp fire out. You and your team are sent to investigate. I know there is a secret cave on Altis, an underwater entrance I believe, but my caves will not be that complex and will be very simple and shallow. Caves in the map will provide an extra challenge in the map as you will need to look out for terrorists that may be hiding in these caves and who are watching you as you approach their hidden cave. 1 Share this post Link to post Share on other sites
RhodesianScout 189 Posted October 17, 2015 This is perhaps the more time consuming part of developing the mod......... working on the terrain. After deciding to go with the 102 km x 102 km map and now being in a part of Rhodesia where there are a lot more hills and kopjes I need to spend a lot of time with getting the look of the hills right. The height map I have is pretty spot on with the elevation data but to get the hills right I need to go in and manually lift each hill up away from the terrain floor....... to do this I need to go through each square km and pull the hill or kopje up away from the valley floor. I have been working on this most of the night..... now 3:16am....... and the terrain is starting to take shape and look pretty good. In the previous map the terrain looked ok but was not great and now that I have more hills, rivers ,lakes and valleys to worry about I need to get them looking 100%. There are 3 or 4 lakes in the map with rivers leading into them and with this current map the lakes are at the foot of the hills...... the previous map was using the height map elevation data and rivers and lakes were half way up a hill slope...not very realistic. The same goes for the road which are now winding their way between the kopjes....... not going up the side of the kopje which is impossible unl Anyway....... the map is progressing well and I probably still have 3 or 4 hours of sculpturing the terrain before I have got this stage of the map complete. Share this post Link to post Share on other sites